Limbform can create, open, and modify databases stored in the ldb file format. The following actions are available in the File menu:

Limbform main screen consists of several tabs that display the various types of data stored in a database. These include experiments, manipulations, morphologies, treatments, species, and publications. In addition, the search tab allows querying the database for specific information. Clicking on a tab will bring up an alphabetic list of all current items corresponding to that data type in the database. Elements of each data type can be created, copied, or edited from these tabs directly, using the buttons on the bottom of the window. Double clicking an element will automatically bring up the edit screen, where all the details of the element can be viewed and edited.

The search tab allows querying the database for searching specific data. A query is constructed with four parameters according to the following format:
The available operators for all the queries are the following:
Example: Search “Morphologies” with “Num. segments” “less than” “3”. This search returns all morphologies that contain less than three segments:

Each data type has specific characteristics that can be used in a query. These include:
Example: morphologies with treatment name containing “morpholino”. This would return all morphologies that can result from any experiment using morpholinos:

Example: Treatments with morphology name containing “Wild Type”. This would return all treatments that can result in the wild type morphology:

In addition, morphologies can be searched according to the number of the following features: segments, joints, digits, and nerves.
Example: Morphologies with number of segments less than three:

Also, publications can be searched by either title or year.
Example: Publications from earlier than 1960:

Finally, a quick search can be performed from any tabs (including the search results). Right clicking on an element will give the option to search for any other parameter with that element as the limiting parameter.
Example: Searching all the treatments that produce a “two outgrowths on cheliped” crayfish morphology:

Two different treatments produce a “two outgrowths on cheliped” crayfish morphology:

A new experiment can be created from scratch or copied from an existing experiment by clicking on “New” or “Copy” at the bottom of the experiment tab in the main window. Double-clicking on an experiment or selecting “Edit” in the main window edits the experiment. During the creation or edition of an experiment, the following interface shows the characteristics of the experiment:

An experiment is divided into its general information, procedure, and results.
The first information to be input in an experiment are the name of the experiment (see naming conventions), the publication, and the species of worm used in the experiment. The publication and species can be selected from an existing one using the dropdown menu or a new one can be created by clicking on “New”. An existing publication or species can also be edited from this screen.

The experiment procedure consist of two parts: treatments applied, and the limb manipulation.
Treatments are defined with two descriptors: the treatment used and the time period during which it was used. Treatments can be added, removed, edited, or created from scratch by clicking on the available buttons in the interface. Once treatments are added to the database, a dropdown menu will allow the selection of the specific treatment. The starting and ending times define when the treatment was performed, being the time relative to the manipulation of the limb (time 0). Zero is the default starting and ending time if no times are given. A treatment with negative time means that it was administered before performing the manipulation. When relevant, dosage information can be included in the title.

A limb manipulation needs to be specified for the experiment. If no manipulation has been made, a wild type morphology can be selected as “no manipulation”. A previously defined manipulation can be selected from the dropdown menu, or a new one can be created. Clicking in the corresponding button, the manipulation editor can be opened from this screen in order to edit, copy, or create a new manipulation for the experiment (see manipulations).

The results of an experiment are specified with result sets. Each result set defines the outcome (resultant morphologies) for a given number of worms after a specific regeneration period since the manipulation. Result sets can be removed, copied, or created from scratch to describe the result of an experiment over different time periods or in different trials. If a different manipulation is used, a separate experiment must be made.
Each result set contains several morphologies that correspond to the phenotypes observed in the experiment. Morphologies can be added or removed from the result set. A dropdown menu allows the selection of each phenotype, which can then be edited or copied, or a new morphology can be created from scratch (see morphologies). Finally, a frequency out of 1 for each morphology defines the penetrance of each of the morphologies in the specific result set. The sum of frequencies must add up to 1. If no frequencies are given, equal amounts are assumed.
The following example shows the results from an experiment. Two different result sets were obtained. The first (result set A) specifies the resultant morphologies of 139 manipulated limbs after 3 days: 50% (69 limbs) regenerated the wild type morphology, whereas 25% (35 limbs) regenerated a lateral segment, and 25% (35 limbs) regenerated an intercalated limb. The second (result set B) specifies the resultant morphologies of another (or same than before) 19 limbs after 9 days: 63% (12 limbs) regenerated a double lateral segment, 21% (4 limbs) regenerated two separated lateral segments, and 16% (3 limbs) regenerated an intercalated limb:

Before creating a manipulation, its category need to be selected in the category selector popup:

Manipulations are created and edited in the manipulation editor, which is divided into two panels. The left panel shows the graphical formalization (defined with a tree structure) of the manipulations being performed. The right panel shows a cartoon representation to aid in the visualization of the manipulation.

To add a manipulation action, left click on the previous manipulation action and then select the type of the new manipulation to add. A manipulation can be added between two existing actions by clicking the first one. Finally, a manipulation can be also deleted by selecting the appropriate action after right clicking on it:

The type of manipulation actions are described below.
When starting a new manipulation, the first selection to be made is the morphology of the starting worm. Any existing morphology can be used or a new one may be created. To change the morphology, click on the morphology marker on the left half of the panel, and then select the desired morphology from the drop down menu on the right:

Three types of manipulations are defined by a single polygonal area: crop, remove, and irradiation. Selecting one of these manipulations actions will produce a box in the right pane. Drag the vertices of the box so that it covers the desired area. Left clicking then right clicking on a vertex will give the option to delete or add a vertex.
Crop will keep only the area inside of the polygon:

Remove will keep only area outside of the polygon:

Relocate will crop the area inside of the polygon, and grafted into another place in the same limb:

Irradiate represents irradiation within the polygon (the doses of the radiation are usually recorded in the manipulation name):

The join manipulation action corresponds to grafting two limb parts together. Selecting a join action will produce a second branch in the manipulation tree. Here, a second morphology can be selected, along with any additional manipulation actions desired. The left tree represents the fixed piece; the right tree represents the movable piece. Once all desired manipulations have been added to the join tree, click on the join action marker in the left panel and both pieces will then appear in the right panel. Clicking and dragging inside the movable piece in the right panel will control the movement of the piece. Clicking and dragging outside the movable piece will control the rotation of the piece.
The join manipulation bifurcates the manipulation tree, creating a left and a right branch with different actions:


The graft position and rotation is adjusted in the interface:

The manipulation shows the final position of the two pieces grafted together:
Before creating a morphology, its category need to be selected in the category selector popup. A category restricts the type of segments that the morphology can contain.
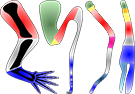
Morphologies are created and edited in the morphology editor, which is divided into two panels. The left panel shows the graphical formalization of the morphology, while the right panel shows a cartoon representation to help with the visualization of the morphology being created.

New morphologies are usually created by copying and editing the wild type morphology. However, new morphologies can be created from scratch as well.
The first step of creating a morphology is to define the segments it contains. Segments are defined as links between joints. To add a segment to an existing joint, right click on the joint and select the desired type of segment under “Add link”. In this example, we will add a new shank in the joint between the existing thigh and shank:

The resulting morphology will display the ectopic shank:
Add region: adds a new region with a connection to the selected region.

In addition, a new segment can be added directly to an existing segment, without creating a joint between them. In this case, we right click on the segment and select the desired type of new segment under “Add link”. In the following example, we will add an ectopic foot segment in the existing shank segment:

The resulting morphology will display the ectopic foot:

Apart from adding a new segment, right clicking on an existing segment will provide several other options:
Change link type: changes the type of the selected segment. For example, the ectopic shank can be changed into an ectopic foot:

Resulting in:

Change link side: toggles between a left-side or right-side limb segment.
Reverse: rotates the segment 180° with respect the proximal-distal axis.
Invert: toggles the start and ending joints of the segment.
Delete selection: deletes the selected segment.
Any number of any types of segments may be added to the morphology in any combination.
Joints can be moved and resized to the desired place by clicking and dragging the marker in the left panel. The connected segments will change their size accordingly. For example, we can extend the length of the thigh by dragging its top joint:

Every joint is defined by a number of external boundaries that defines the boundary shape of the limb. A joint connected to a single segment will have three external boundaries. A joint connected to two or more segments will have an external boundary between every set of connections. To adjust a boundary, left click and drag the red circle corresponding to the boundary.
In the following example, we have reduced the size of the joint between the thigh and shank regions by dragging the red dots towards the joint:

Digits and nerves can be added to the selected segment by right clicking the segment node in the left panel. To delete the selected digit or nerve, right click on its node in the left panel and choose “delete selection”.
Adding a digit to a segment:

Resultant morphology:

Nerves are defined by a list of locations defining the position of the nerve. To move the location of an organ, left click and drag its marker to the desired location. To rotate the selected organ, left click and drag the blue circle on the border of the marker.
Nerves are defined by a list of points. Point can be added to a nerve to extend it. To adjust the location of the nerve points, select the nerve point marker, and then click and drag the marker.
Adding the first point of a nerve:

Resulting nerve point:

Adding a second point to the nerve:

Resulting two-point nerve:

Any number of nodes can be added to a nerve to define its path in the limb:

Any names may be used in the database, but several conventions were used when making the central database.
The following rules were used for naming experiments in the database:
Manipulations and Morphologies names are created as explicit and modular as possible. Manipulation names describe each type of manipulation action performed in succession. Morphology names describe sequentially each morphological variation from the wild type. The goal of using a modular approach is to aid in both locating existing entries and adding new entries in an organized fashion. Common traits are always put first in names, so that similar manipulations and morphologies are in close proximity in alphabetical order.
Clicking off the image in either panel in an editor, and then holding ctrl and sliding the mouse wheel will zoom the contents of the screen in or out. Alternatively, when using a laptop pad, zooming can be achieved by holding one finger fixed and sliding a second finger.

Right clicking on the blank area of any image will give the option to export the image as a png, jpg, or bmp file: